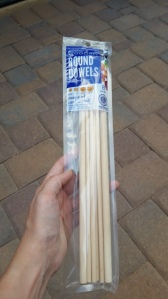
 So the first craft I’m going to show you, is the first craft I started making for my fellas’ Harry Potter party. The first craft I started with just happened to be WANDS. Yay! So after perusing a bunch of pins on Pinterest, I got an idea of how to make these bad boys myself. I decided to go with dowel rods (though you can make them with paper too) I just thought it felt/looked more realistic to make them with dowel rods. I also thought they might hold up better which is important in a children’s birthday party!
First I took my dremmel tool and sanded one end down to a tip.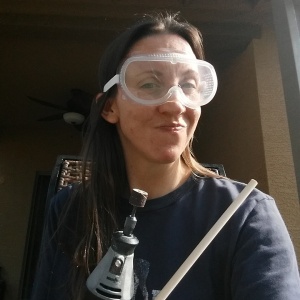 I also chunked up the rest of the stick to try to make it look more “natural wood-like” but if I had it to do over with I’d leave them smooth. They don’t look bad, I just think they’d look better smooth.
Next, since I was making about 40 of them, I made myself a little wand making station. 🙂 (AKA a box with the top cut out and holes punched in it of various sizes to hold the wands while they cooled. In case you’re interested, here’s what it looks like.
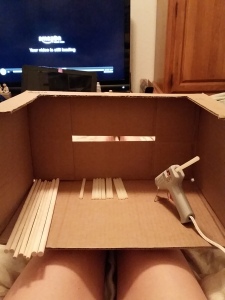
I just worked on them while I watched me some Netflix. After making a couple with just the glue gun and different patterns, I felt confident enough to take my wand making game up a level. I bought an inexpensive wood-burner and some beads.
And the beads can be any shape you’d like and the color doesn’t matter since you will be painting over them but I’ve found that lighter shades are easier to cover.
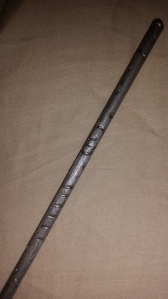
On the thinner wands I used the wood burner to carve some patterns and designs on them. The beads I hot glued on in different places and I had some larger ones that I put on the end of some of my wands. Just try different things and if you run out of ideas you can pull up images of Harry Potter wands for inspiration.
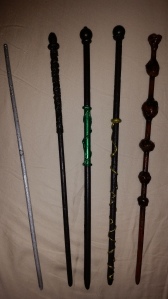
Once you have the glue, burning (if you want to get that crazy) and beads done and everything is cooled you can start painting. I purchased a couple different browns and some white and ivory, along with some colors for accents. I chose the metallic colors because I think they look the best but you can do whatever colors you prefer. Here are a few examples of the finished products!
After the paint was dry I applied a couple coats of sealer just to keep the paint on the wands and not on the kids’ hands. 🙂
Be sure to apply the sealer outdoors, the smell is really, really strong and not good for indoors. Once the sealer is set/dry, your wands are ready to go. I really love how these turned out and I may be giving some away after the party (if I have some left over) on my Instagram account so if you aren’t following me there you should be!
Join Piazza Parties for the next craft soon, we’ll be working on book covers for Harry Potter books.
Why buy when you can be your own wand maker, right? Awesome job! Ollivander would be proud. Haha!
LikeLike
I know right?! It’s so much more fun to make them yourself!
LikeLike
Thank you so much for posting this, you just made my day. I’m planning a Halloween party, and your wand making tips are awesome. Sincerely, A Harry Potter Fan!
LikeLike
The wands were a big hit. And I’m super glad I sealed them because my son and his friends had them in the pool before I could even notice. Haha they held up well. I was really pleased with how they turned out! Enjoy!
LikeLike